A little while ago
I was browsing the many interesting pages of ebay
in the hope of finding replacements for the items of Radford HiFi
equipment that had been taken from my home in Bristol back in 1982.
Amongst those items was a Radford STA25 Mk3 - Yes, of course, I was
devastated to have lost my pride and joy, so you can imagine my
excitement when an old STA25 kit came up for auction.
|
This was that kit, that to my delight and against all the odds, I eventually won on that
Ebay auction.
This kit had not been very well constructed, and from the state of the
components on the hand made paxolin boards, it looked as if the guy
that had put it together never actually had it working properly. But
there was one good thing about it - all the wirewound components were
in great shape.
So how was I going to go about returning it to it's former glory?

I obtained loads of pics from this Group and elswhere then decided
to try and rebuild this amplifier in the same way as Arthur Radford
had done in the early sixties.
Yes, thats right, build a new STA25 from scratch. A daunting task.
I was lucky enough to have been working at Radfords at the Ashton Vale
factory when these amplifiers were originally made, so I had a rough
idea as to how these amps were constructed, but over the years that
have passed my memory of dimensions has become somewhat vague and this
is where our Group Founder - Carl - has come to the rescue.
Carl painstakingly took on the task of providing me with every single
dimension that I required. He overlaid every dimension needed on pics
that he had taken of his own STA25. He even provided scans of the
Woodside boards - with dimensions - so that I would be able to etch my
own circuit boards. I can never thank him enough for his efforts.
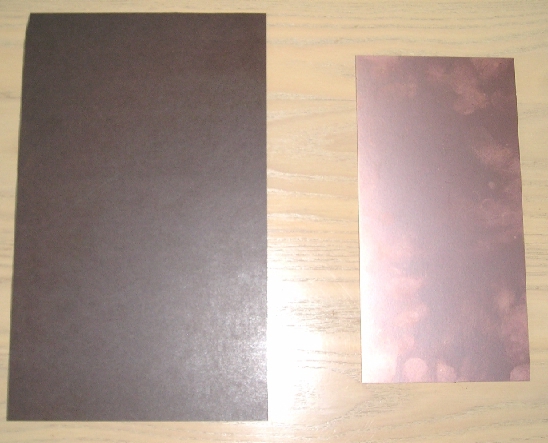
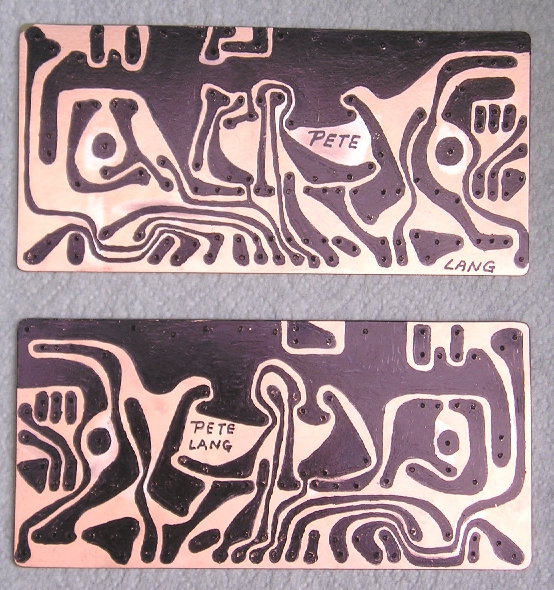
This is where I had my first real problem. The type of copper faced
board as used by Arthur Radford back in the sixties has not been made
for a very long time and is now unobtainable.
So now which way to go?
A possible answer cropped up when one of our Members, Jan Hawranke,
thought that he might have saved his old circuit boards, complete with
components, if he could only find them. That would be a fantastic result
if it came to fruition - but alas, it now looks as if they have been
scrapped at some time in the past. So I will now have to etch my own
boards with modern material - I am going to have to somehow stain the
composite side of the boards in order to make them look something like
the type of board that was used back in the sixties.
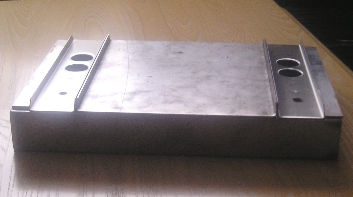
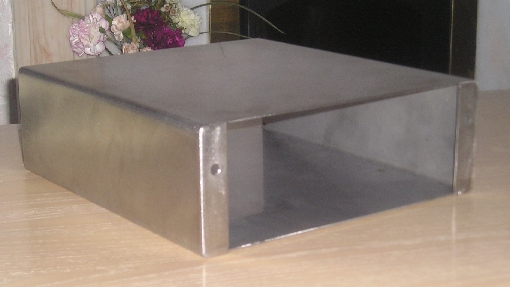
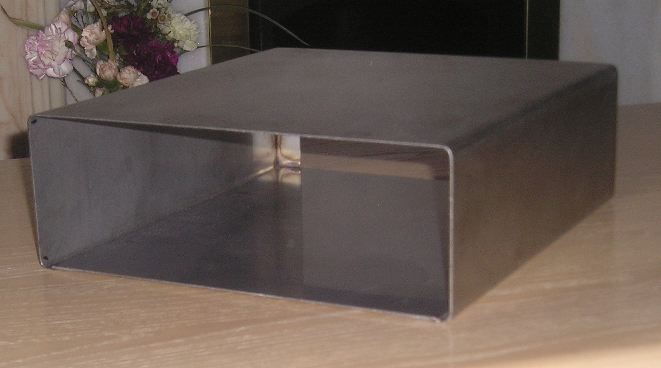
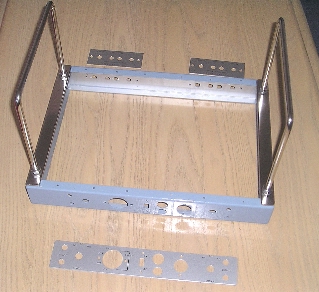
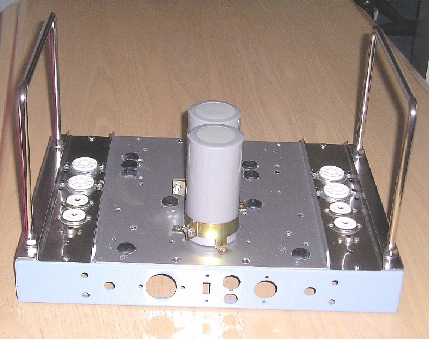
While all this has been going on I have got hold of most of the metal
required to construct the chassis and have so far made the basic box that
carries the valve and transormer trays. I am still waiting for the metal
rod to make the handles but have now got the handle carries through which
the handles pass.
It is at this stage that I have taken a few pics so that you can see how
far I have got with this project. I nearly forgot to do this but remembered
just in time.

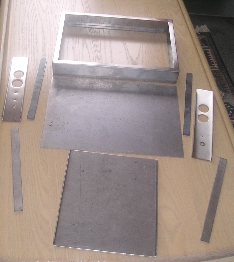
Put all the bits of metal together and the birth of a brand new STA25 amplifier can start to be visualised.
I now face another problem with the type of perforated metal that Arthur
had used when he constructed the transformer cover - it would appear to
be a 3.5mm square hole on a 4mm or 5mm pitch. Once again, this type of
perforated metal is no longer produced by any of the manufacturers, but
they could make it for me at a tremendous cost!
A few months have now gone past and in that time I have managed to locate
just enough of the old PCB board, (similiar to that used by Arthur in his
original STA25 amplifiers) to etch my circuit boards.
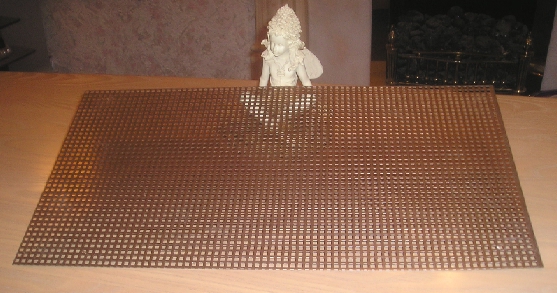
And, to my great relief, one of our members - Neils Broe - has contacted me and managed to
get hold of, and send me, a suitable sized sheet of the perforated metal that I need to
construct the transformer cage.The perforations are slightly larger than those used on
most of the Radford gear, but as Arthur had used a similiar more open mesh on ocassions during
production of the amps, then I will be going ahead and constructing the case with this sheet
that Neils has so kindly sent to me.
I have also got hold of some stainless steel rod and had them bent into the shape required for
the handles - put an appropriate thread on them and the matching nuts - and they look and feel
exactly the same as the original types fitted to the STA25.
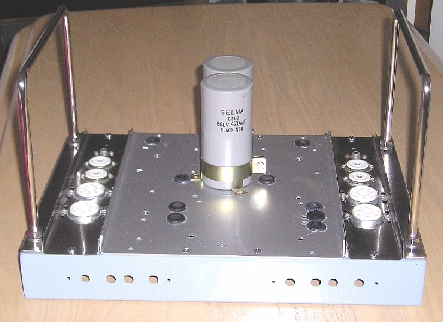
Here are a couple
of the pics that I sent to Carl recently, but on reflection, this new build is beginning
to somehow get away from my original intention of keeping this project as near original
as I possibly can, so I have decided to do away with the stainless steel valve trays with
the ceramic valve bases and go down the more authentic route with mild steel and older, more
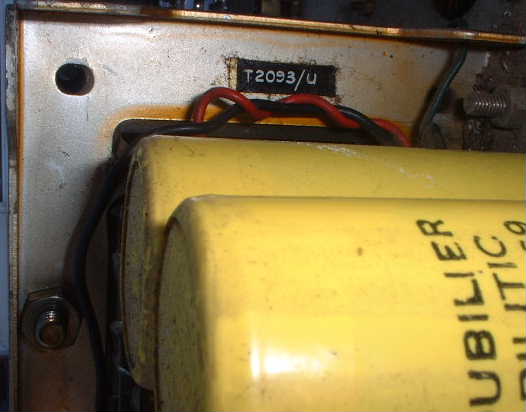
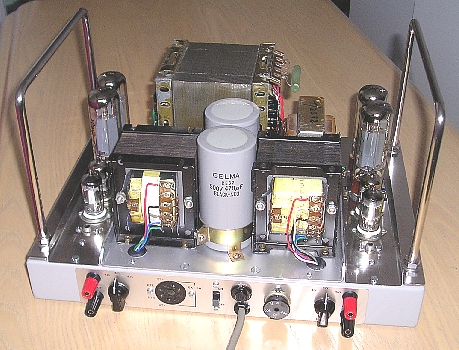
original valve bases. This would also mean not using those nice big new mains capacitors. A
shame really, as being 470's at 500V instead of the original 100's at 450V they would have
given a tighter bass sound to the finished amp - and, as you can see from the pictures above,
I could have got them under the transformer cage.
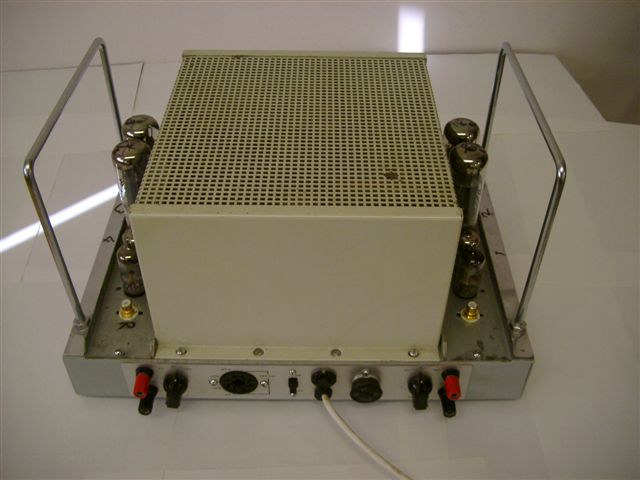
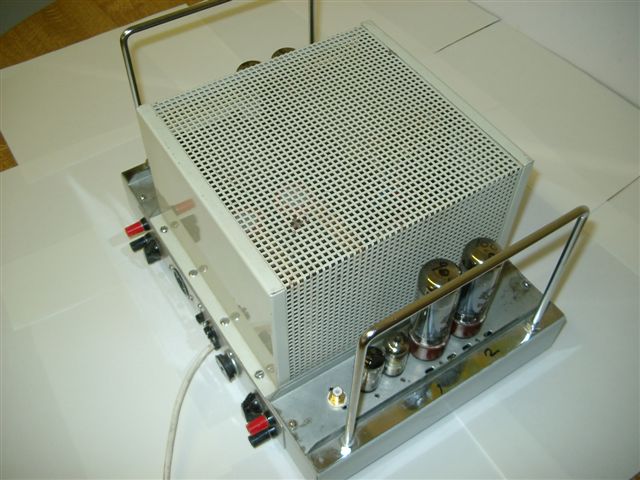
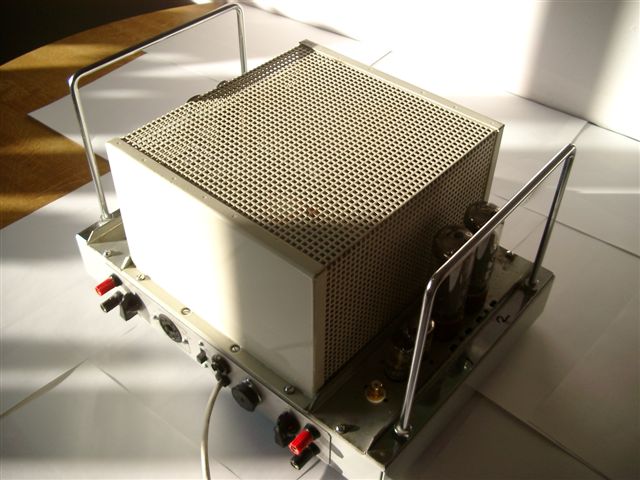
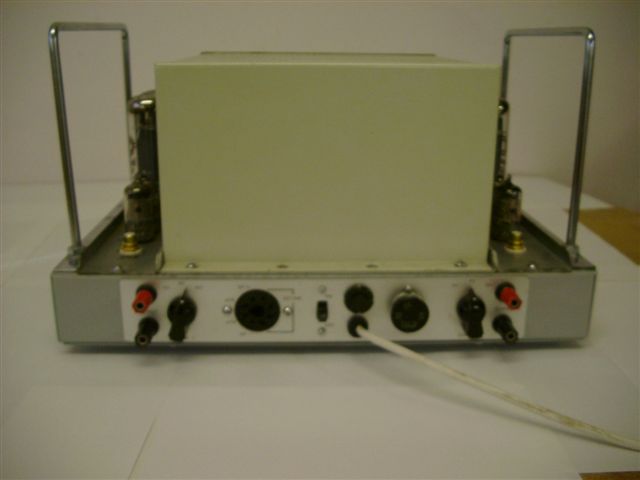
!!!Joy - Oh Joy!!!, I have
been able to aquire the original STA25 amplifier (pics below) that Arthur Radford had donated to the Bristol
Recorded Music Society (established in 1938) when he became their Patron/President sometime in the
1960's. This Amplifier was unplated and unserialised and obviously was taken directly from the final
test bench before having it's serial number attached.I was told about it's imminent departure from
the Society and made them an offer they did'nt refuse.All legal and above board and dealt with by
their treasurer Mr. Harold Bennet of Winterbourne Bristol.Before you ask, no, I will not disclose the
amount paid for it as it would upset far to many people - in it's condition, and with the work that
is required to be done to bring it back to it's former glory, it was a very fair price to pay.
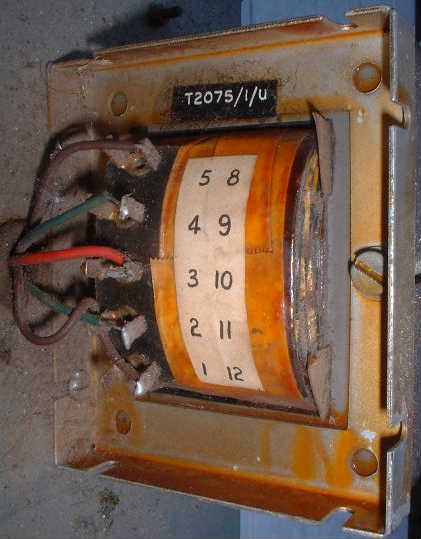
The Amp was suffering from several problems. Apparantly there was a fault with the bias that not only took
out the bias power supply winding in the mains transformer, requiring its replacement,but It had also taken out
the components of the bias supply board, including the bias adjustment pots.And if that was not enough one of
the output transformers had also been replaced with a black output transformer from Woodside electronics.
When I got it home and took it apart I found that the power transformer had also come from Woodside, at a cost
of £95 according to the invoice supplied with the paperwork for the amp. I was told that it had been working OK
for a couple of hours when one of the valves suddenly started glowing extra red, so they switched it off and decided
to part with it rather than incur any further repair expences. That is of course where I got lucky. Not quite so lucky
was the fact that the remaining output transformer was also damaged.
Now I had another dilema - do I put the transformers that I intended to use into this original amp or leave them
in the new build?
Silly question really - Of course they had to go
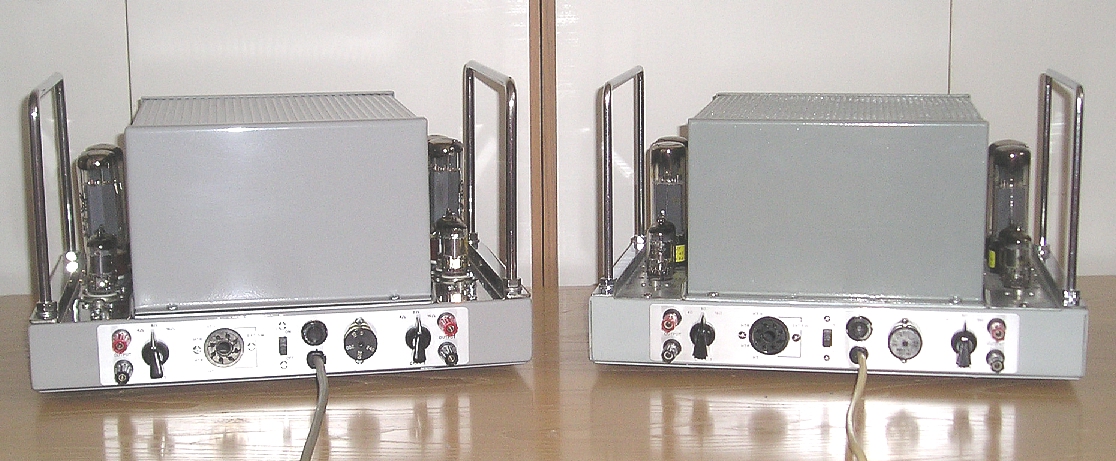
into the original amp. With the bias pots replaced and some of the components in the chassis renewed,not to mention those gold
plated phono sockets, the STA25 is again singing like a bird. Especially when coupled to the SC22 that Carl so kindly agreed
to sell me.I have also smartened up the STA25 with a respray to the transformer cage.
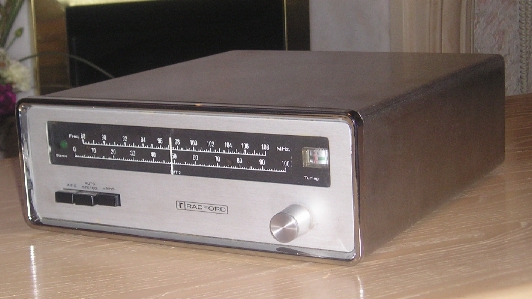
I saw an FMT2 on Ebay a while back - without it's case - Went for it and got it, and have since aquired some metal and made
a new case. As the original design called for a non perforated case (no problem with heat as in the FMT1 with it's valve lineup)
it was easier to construct. As yet it is still unpainted, but that is a small job for the future - sounds great through the
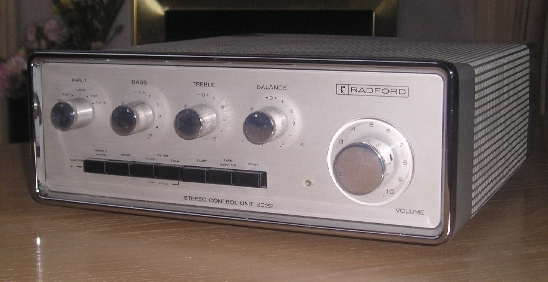
SC22 pre-amp.Pics below, including Carl's ex SC22 with damage to front bezel repaired.
|
I have strayed away from
this STA25 new build and will get back to where I left it earlier.
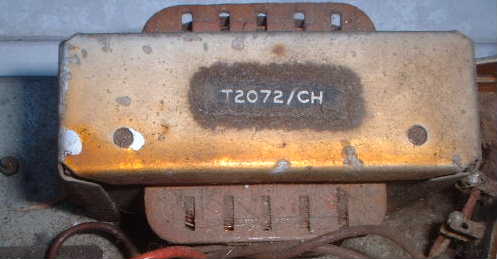
I am now minus the original mains transformer and both the original output transformers that were in the STA25
kit I had won on that Ebay auction, so before I decided what step to make next I substituted the Black Woodside
output transformer back into the original STA25 amp so that I might compare the qualities of both
transformers at the same time, and was very pleased to find that there was no way that I could tell
them apart - the frequency response was the same throughout the entire spectrum covered by the STA25.
An electronic engineer at the BBC kindly conducted this test for me and I am delighted to say that
for anyone with an STA 25 with a blown output transformer you can safely replace it with a Woodside version.
Equally, the Woodside mains transformer can be used to replace the original transformer on my new build as it is
electronicaly identical to the original Radford version.
As I can now go ahead and use the Woodside output transformer, I just have to find one more
of them to complete my transformer lineup for this project. I don't want to buy a Sowter type as I would
require two of them and I have already confirmed the quality of the Woodside version. It turns out that the
Woodside mains and output transformers were in actual fact wound by the same person that wound the original
series of transformers while she worked at the Radford factory during the production of the STA series of Amplifiers.
While all this has been going on I have etched the circuit boards and will soon start populating them with the
relevant components. I have also decided that I really want to make use of those 470 Mfd 500V caps in the
Power supply circuit, especially as I am convinced that they will give me a tighter and more controlled Bass responce
than the original STA25 with its 100 Mfd capacitors - and they will fit under the transformer cage. I am also going
to keep the stainless steel valve trays and ceramic valve bases - the whole appearance will stay brighter for longer.
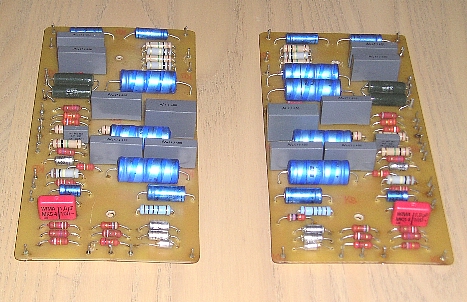
To my horror, I discovered that I had
made an error with the circuit that I had etched onto the old style copper plated boards that had taken me so
long to find. It would have messed up the boards to try and correct the mistake, so I have regretfully had to
etch the corrected circuit layout onto somewhat more modern replacements.It would have been nice to keep the
chocolate brown colour of the original type of board, but I suppose that whatever the colour of the
board it serves the same purpose.
The pics below show the corrected boards and also the nearly completed transformer cage, using the perforated
metal that Neils had sent to me. For comparison I have also included a pic of this Cage sat next to the original
cage from the STA25 Amp pictured earlier.
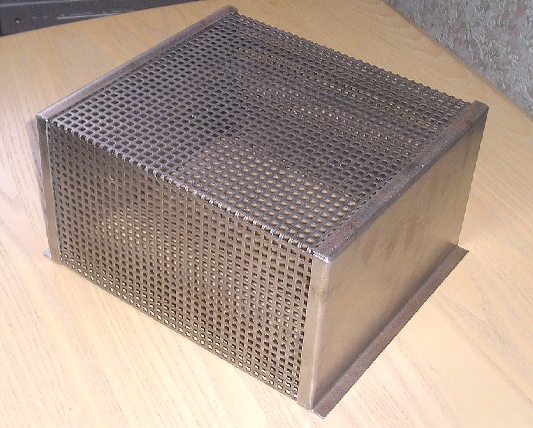

In the above picture, the new cage looks larger than the original, but this is an optical illusion. The dimensions of
each cage are identical. Now it just needs drilling and painting.
Neils Broe is turning out to be a tremendous
help with this new build of mine as he has offered me the Woodside output transformer that he had sitting on a shelf
at his workshop. And true to his word, after a short negotiation period, it arrived safe and sound at my home in Bristol.
I can now continue with my new build safe in the knowledge that I have everything needed to complete the project.
Time now to start painting the chassis parts,getting the bias and control plates made and populating the newly etched
circuit boards.
I am now beginning to feel a little tingle of excitement at the prospect of finishing this project and listening to the
end result. With any luck it should not look that much different from an original STA25.
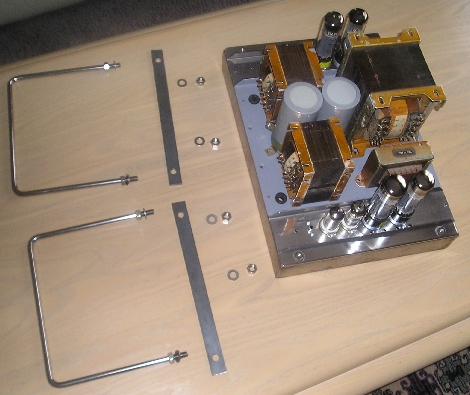
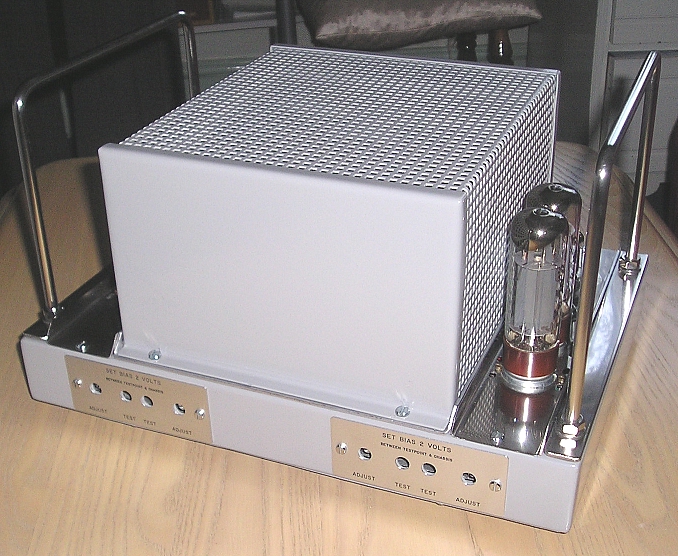
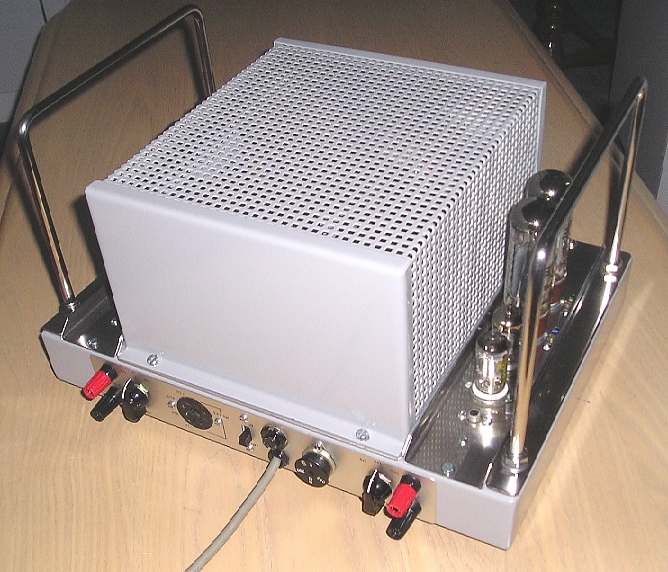
The chassis parts are now painted and the bias & control
panel plates are ready for fitting. The pics below show the various stages of build.
Now comes the tricky bit. Starting the internal fit of the Component boards and Transformers, and
of course, the correct connections between all the different items that make up the complete Amplifier circuit.
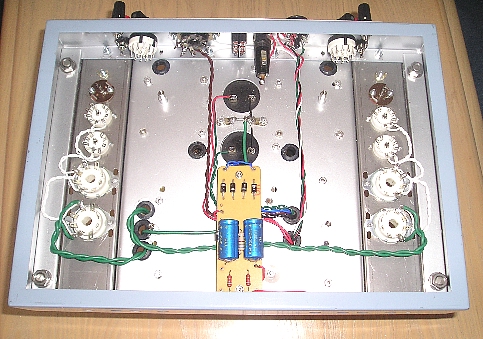
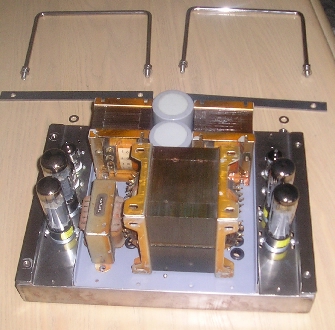
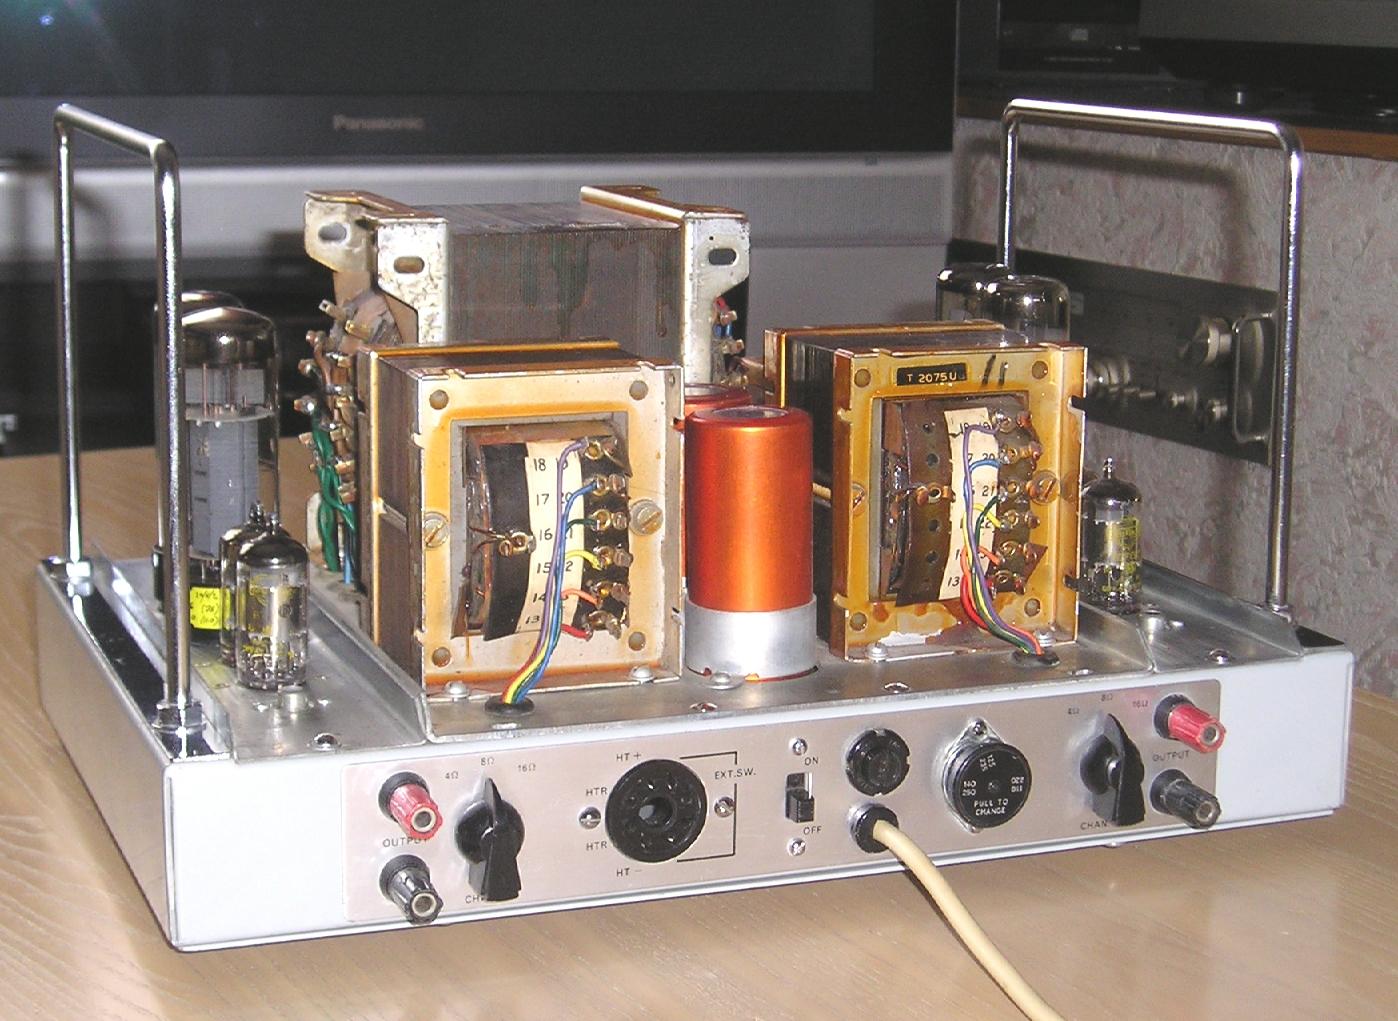
With the Transformers, choke and boards fitted, it only requires a little more wiring.

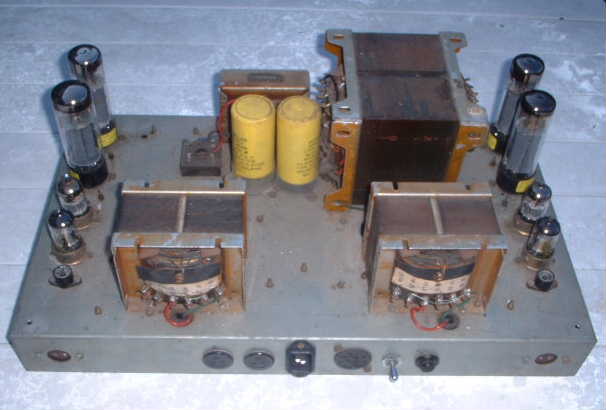
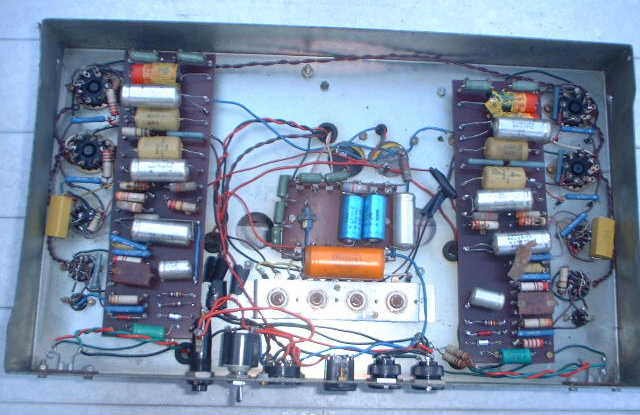
The pictures below show the nearly completed new build of the STA25. The lower left shows the
Output transformer that Neils had sent to me. Neils will know that his ex-transformer is fitted
to the channel 2 output stage. The Picture, lower right, shows a good view of the Woodside
mains transformer that was fitted to the original STA25 that I aquired when I was almost
halfway through this new build.

Now that the new build is electronically complete I can run it up. I took the precaution of using a
Variac to run it up slowly, so as to allow any capacitors that needed it the time to reform.
All is as it should be, and the Amplifier, fed by Carls ex-SC22, sounds absolutely stunning.
As I had hoped, the bass is tighter and carries a more realistic punch than the original STA25. I am
glad that I eventually decided to use those larger capacitors. And just for the record I also used
the capacitor bypass mods with good effect to the mid and tops - now very transparent.
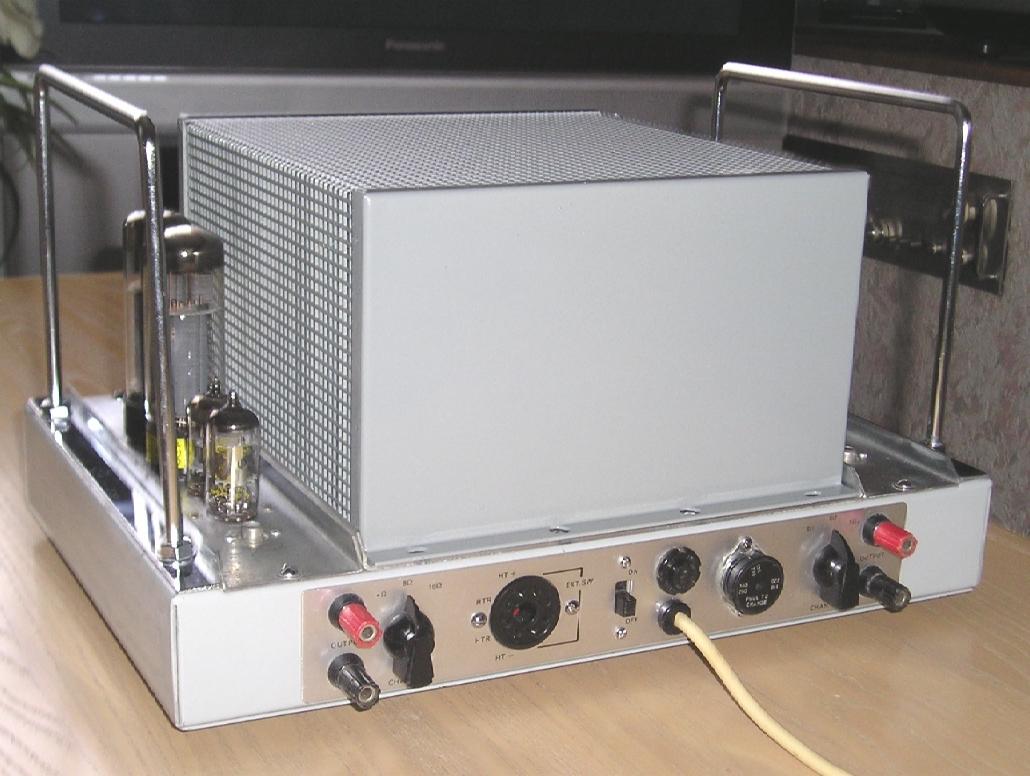
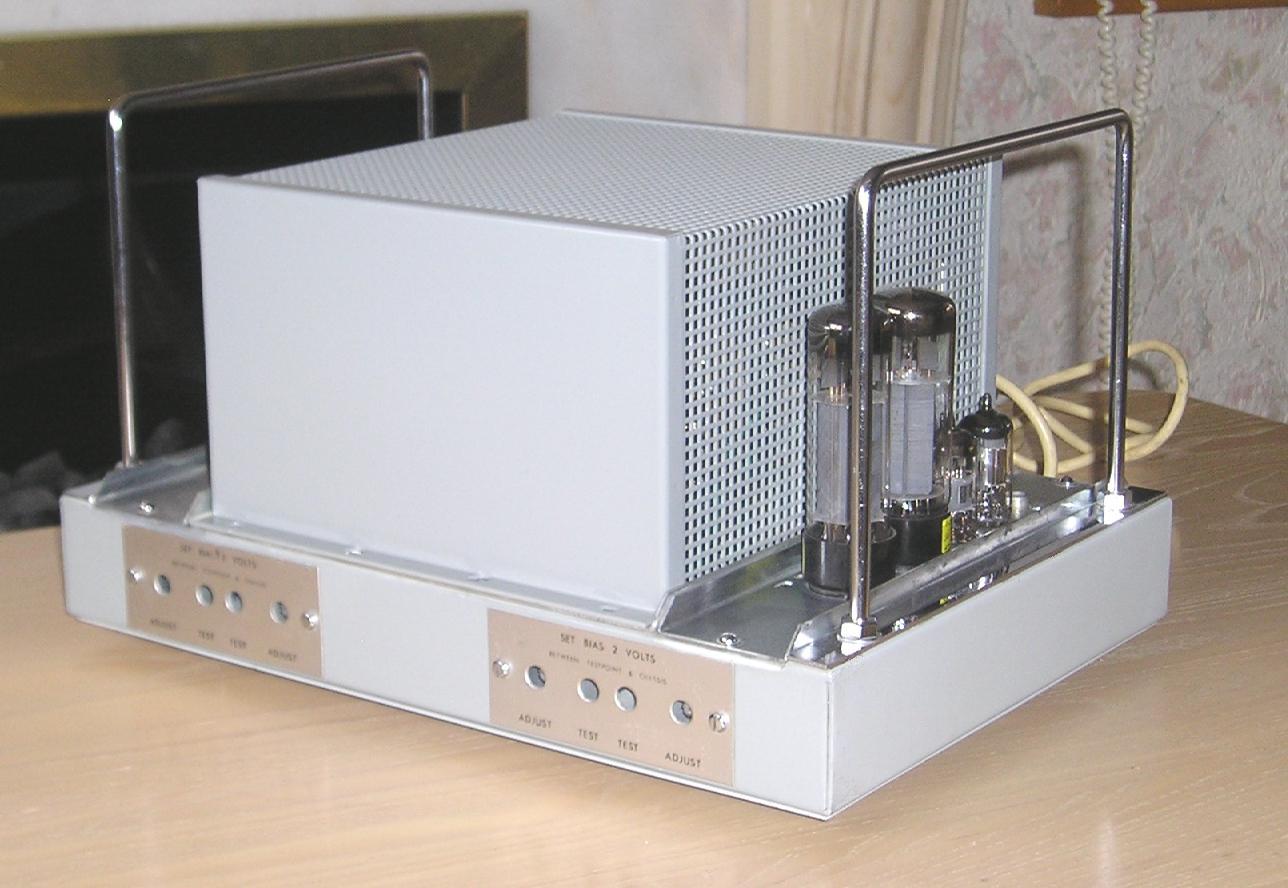
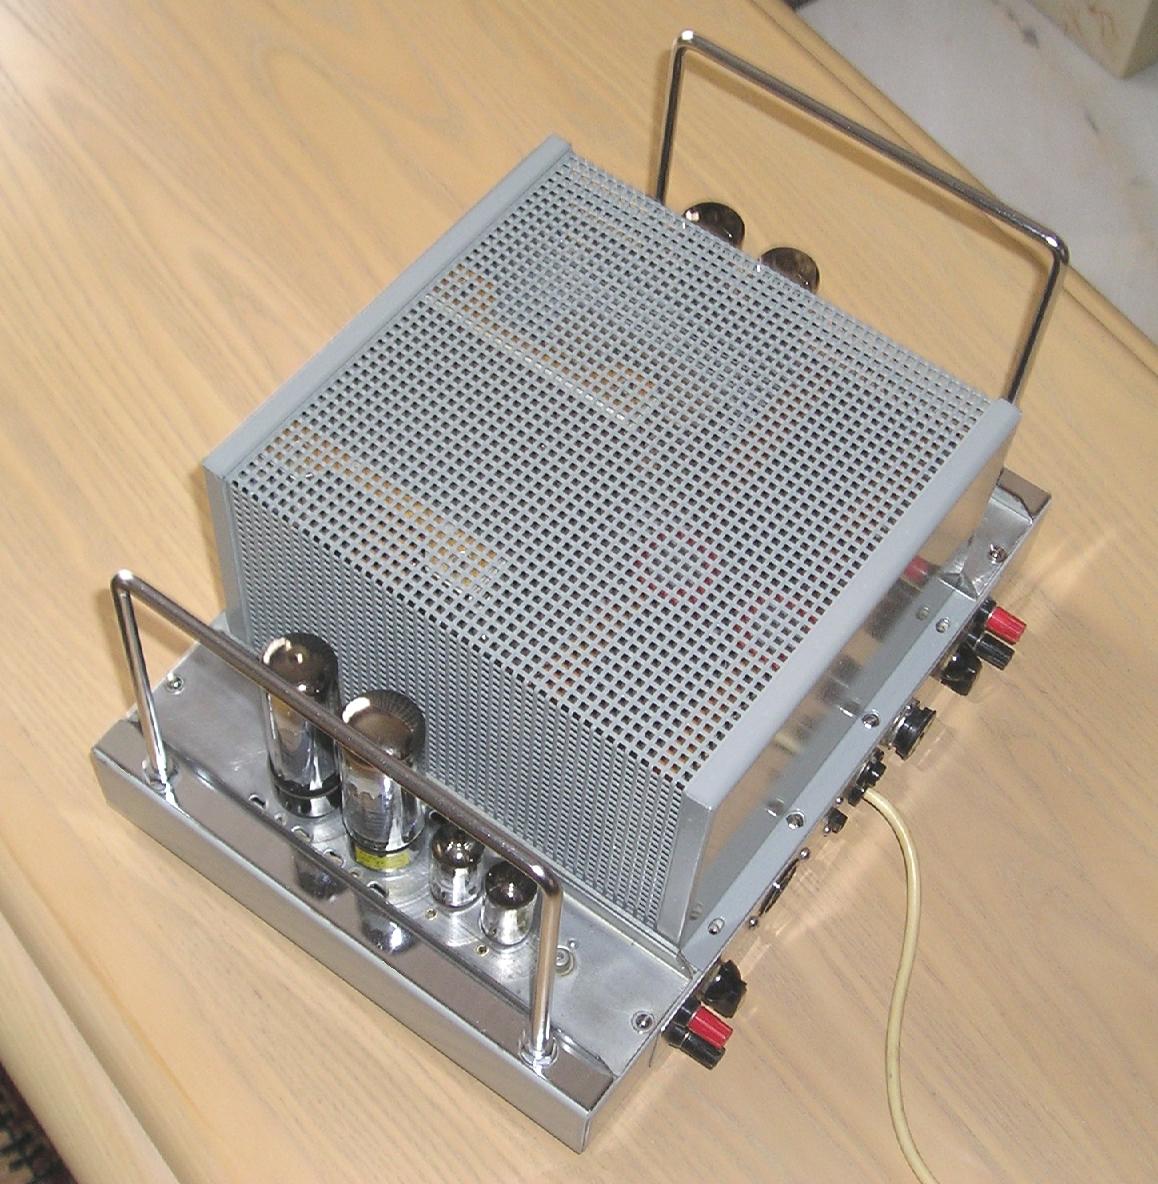
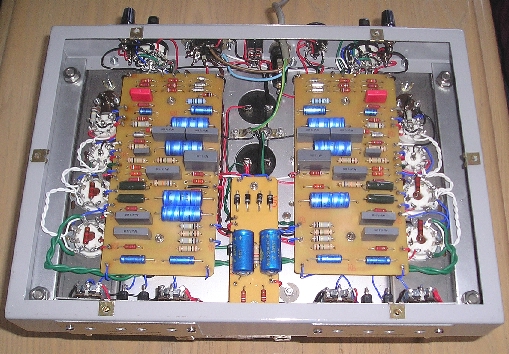
Here are a couple of pics of the finished project.
I hope that Arthur himself would have approved of my humble efforts to re-create his classic masterpeice of over 40
years ago.
It only remains for me to thank all those in our Group that gave me assistance along the way to complete my STA25 New Build.
Special thanks go to Carl and Neils, without whom this project of mine would probably never have been completed.
| | | | | | | | | | | | | | | | |